5 KiB
5 KiB
Notes on Lesson 06 - Selections | PiXimperfect
- Links
- Notes
Links
- TOC | Photoshop for Beginners
- Downloadable Practice Files
- Curr: https://youtu.be/jBCDKCpsmso?si=p04UcrDiAYCQ0gzi&t=1327
timestamps
- 00:00 - What are Selections?
- 02:50 - Important Announcements
- 03:49 - Ways to Make Selections
- 06:05 - Lasso & Polygonal Lasso Tool
- 12:17 - Quick Selection Tool
- 16:39 - Select Sky
- 18:02 - Select Subject
- 22:07 - Color Range current
- 27:14 - Select and Mask
- 32:02 - Obsolete Techniques
- 32:43 - Save and Load Selections
- 33:56 - Modifying Selections: Contract
- 35:38 - Modifying Selections: Expand
- 38:41 - Modifying Selections: Feather
- 41:11 - Important Reminder
Notes
selection tool intro
- a selection is an area we are targeting
- the quick selection tools try to find edges
- you can increase or decrease the size of the brush via the ][ keys
-
select with the brush by painting over what you want
how to make selections
-
lasso tools
- marquee tools
- quick selection tool
-
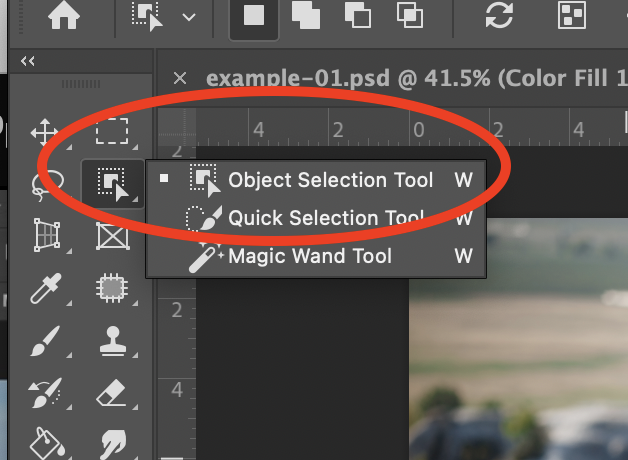
object selection tool
- click on the icon
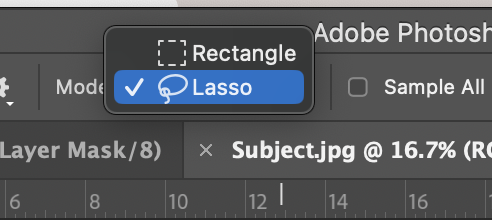
- choose the mode (rectangle or lasso)
-
circle the object
-
pen tool
- takes a long time
- precise
- used in commercial
- color
- select and mask
-
adobe AI masking
- select subject
- select sky
-
misc
- brush tools
- channels
lasso & polygonal lasso tool
- select anything with the lasso tool
- to switch between lasso and polygonal hit ALT
lasso tool
close the selection
- double click
deselect
- CMD+D
create a new layer with selection
- go to layers and select the layer you want
- hit CMD+J
content aware fill
- Edit-> Content Aware Fill
fill the area with a color
- OPT+DELETE
polygonal
deletes last point
- CMD+DELETE
adding and take away
- subtract: ALT
- add: SHIFT
you can also do this using buttons
file:../_share/media/img/piximperfect/photoshop/lesson-06/E03.png
quick selection
- file:../_share/data/piximperfect/photoshop/lesson06/examples/example-04.psd
- tries to find the edges of the object
-
all you have to do is just paint over it
file:../_share/media/img/piximperfect/photoshop/lesson-06/E04.png
sample all layers
- when checked off it only looks at the currently selected layer
- when check on, it looks at all layers under the cursor when making a selection
make a mask
just click the mask button in selection
place image on top of another
-
create a new layer based on the original by dragging the original layer down to the plus button
- the cursor will change to a hand symbol and you will have to move that over the correct button
file:../_share/media/img/piximperfect/photoshop/lesson-06/E05.png
- click the mask button on the new layer
- add an image between the original and the new selected one
- pick a different blending mode (ie linear burn) that will affect the background of the original image but not the selected section which you place above
-
use curves to lighten parts of the image
-
you can limit the curve effect using masks
- select the mask icon
- click CMD+I
- paint the white area you want to use
- use a gradient white-black
-
select sky
exactly what it sounds like
select subject
in the top bar under 'select subject' you can drop down and choose to use adobe's servers